BioSemi USB trigger interface (for Presentation or E-prime)
 
Stimulus software such as Presentation need a parallel port for outputting its trigger signals, but most modern PC's and Laptops do not have a parallel port output anymore. Using a standard USB to parallel port converter cable does not work, because these converter cables are not detected correctly by the Presentation software. The BioSemi USB Trigger Interface is not detected as a parallel port, but it is detected as a serial port.
On the below screen shot the Parallel port is shown as the green trace and the BioSemi USB Trigger Interface is displayed as the yellow trace.
The delay of the BioSemi USB Trigger Interface (compared to the parallel port) is less than 200uSeconds. The jitter is less than 100uSeconds. Every value written to the USB Trigger Interface will be available at the USB Trigger Interface output for 8mS.

If you want to control the USB Trigger Interface through MatLab then you can find the documentation on how to control a serial port from MatLab here: https://nl.mathworks.com/help/Matlab/ref/serial.html
An example of a MatLab script you can find here. This MatLab script writes the trigger value '255' for 500 times with an interval of 0,5 seconds.

The BioSemi USB Trigger Interface is able to output 8 parallel bits and interfaces direct to the BioSemi USB Receiver trigger input/output connector.
How the USB Receiver handles Triggers is described here: How are stimulator trigger signals handled by BioSemi hard and software ?
 
 
Ordercode: USB Trigger Interface
Price: 100 Euro
The trigger interface is recognized by the PC as a serial Com-port and needs no driver.
When plugged into the USB port, it will be shown in the Device Manager like this and will make this sound.
You can connect to the trigger interface with the following settings:
Data Rate: 115200
Data Bits: 8
Stop Bits: 1
Parity: none
Flow Control: off
After a data Byte has been sent to the serial port of the USB Trigger Interface, the pins of the USB Trigger Interface will respond immediately and will hold this value for 8mS. After 8mS, all pins will be reset to zero.


USB Trigger Interface connections (37 pins male Sub-D)
 
Pin01
Trigger output 1
Pin02
Trigger output 2
Pin03
Trigger output 3
Pin04
Trigger output 4
Pin05
Trigger output 5
Pin06
Trigger output 6
Pin07
Trigger output 7
Pin08
Trigger output 8
Pin09
Ground
Pin10
Ground
Pin11
Ground
Pin12
Ground
Pin13
Ground
Pin14
Ground
Pin15
Ground
Pin16
Ground
Pin17
Not connected
Pin18
Not connected
Pin19
Not connected
Pin20
Not connected
Pin21
Not connected
Pin22
Not connected
Pin23
Not connected
Pin24
Not connected
Pin25
Not connected
Pin26
Not connected
Pin27
Not connected
Pin28
Not connected
Pin29
Not connected
Pin30
Not connected
Pin31
Not connected
Pin32
Not connected
Pin33
OEM test intput
Pin34
OEM test intput
Pin35

OEM test intput

Pin36
Supply Voltage
Pin37
Ground


- YouTube video explaining the Timing Delays when using the USB Trigger Interface.
- How to sent triggers with Python?

When sending triggers from E-Prime, then add a Serial device and set the appropriate settings: COM number, Baud Rate, etc.
To send the triggers, use Task Events, Configure Task Events, How to Task Events.
Because all pins of the USB Trigger Interface are reset after 8mSec, you do not need to clear the port before sending a new trigger.

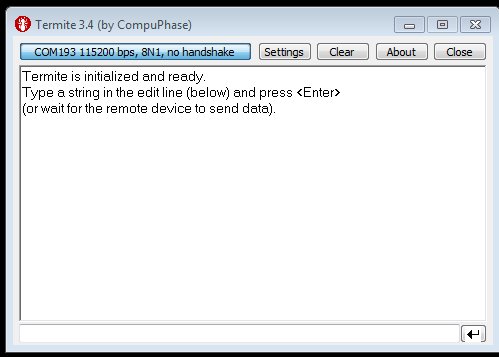
In the case that you want to easily/quickly test if your BioSemi USB Trigger Interface is working correctly, then you can do this by using the small Terminal test program called "Termite"

Connect the USB Trigger Interface with a USB cable to your PC.
Connect the USB Trigger Interface to the BioSemi USB Receiver.
Install Termite, and run Termite. (https://www.compuphase.com/software/termite-3.4.exe)
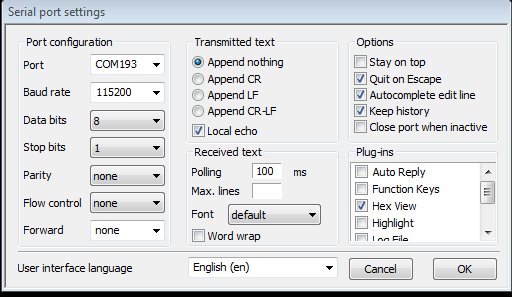
Press "Settings"
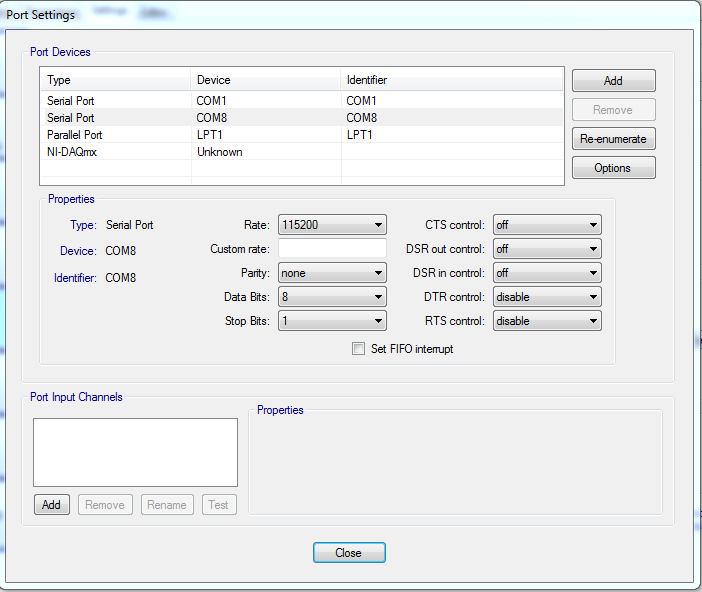
At "Port" enter the COM port at which the USB Trigger Interface is located.
At "Bautrate" enter: 115200.
At "Transmitted text" select "Append nothing"
At "Plug-ins" select "Hex View
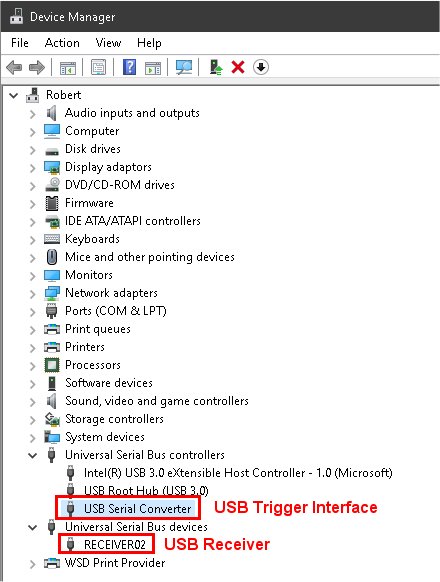
You can find the COM port at which the USB Trigger Interface is installed in the Windows Device Manager. The below screenshot shows the settings for a USB Trigger Interface installed at COM193.
Now open the Termite terminal by clicking on "OK"
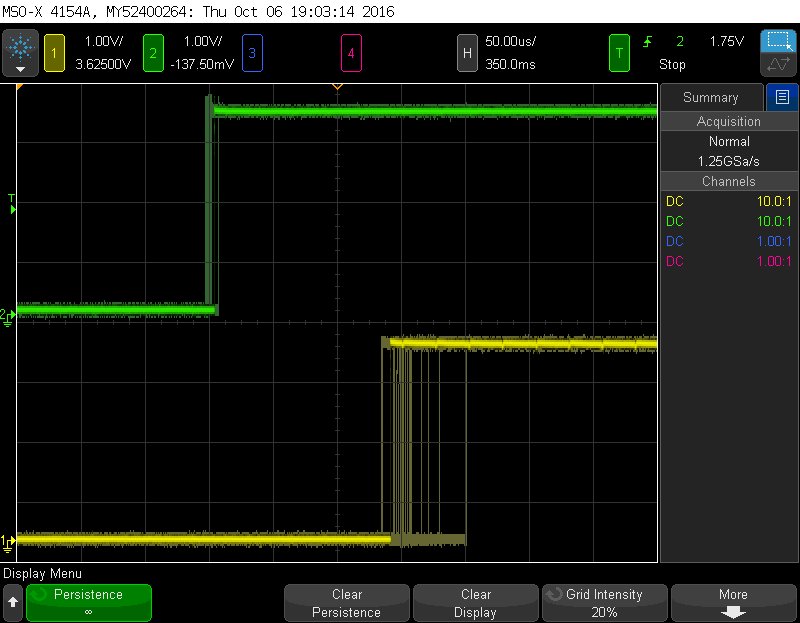
Run ActiView and start the data acquisition. Now select the Termite window and type the following codes to see triggers in ActiView: 0x01, 0x02, 0x04, 0x08, 0x10, 0x20, 0x40, 0x80
This will show the triggers: 1, 2, 4, 8, 16, 32, 64, 128

In the case that Windows does not detects the BioSemi USB Trigger Interface correctly than:
- remove the driver of the device (probably listed under Other Devices) right click and un-install.
- remove the device from the USB port and insert it again.
- Windows should now detect the device automatically and install the drivers automatically.

If that does not work, than you can try the below drivers:
https://ftdichip.com/wp-content/uploads/2021/08/CDM212364_Setup.zip